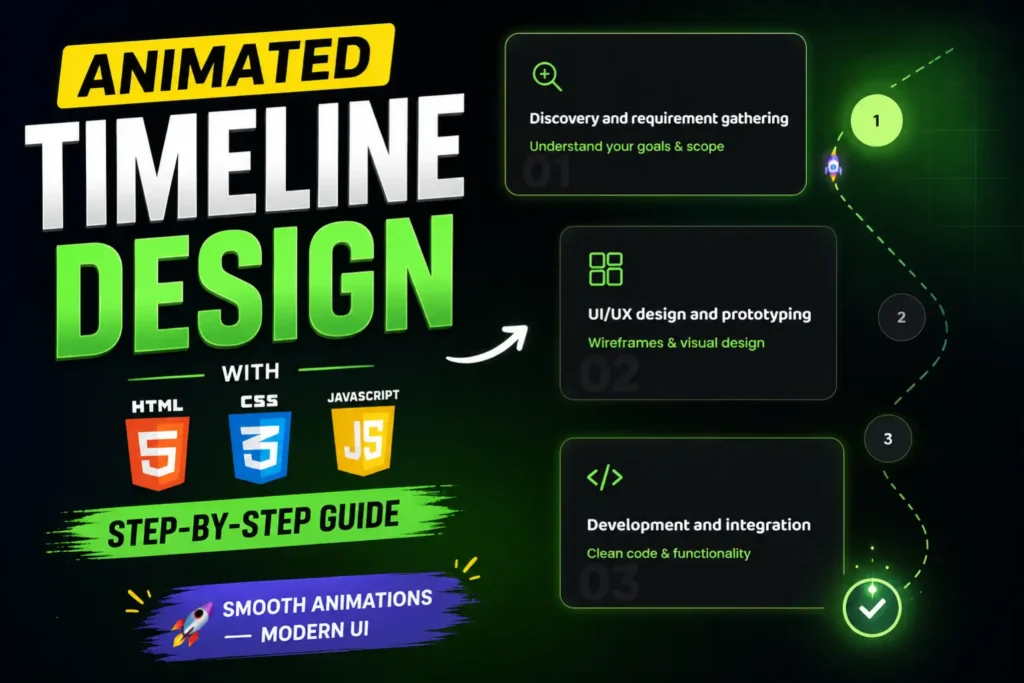
A well-designed timeline can turn ordinary information into a visual story. Instead of presenting a series of steps as plain text, an animated timeline website design can guide visitors through a process using movement, progress indicators, visual hierarchy, and interactive effects.
This project demonstrates exactly that approach with a modern timeline interface created using HTML, CSS, and JavaScript. The design combines a vertical timeline, animated progress path, step cards, scroll-based interactions, SVG elements, a moving rocket, decorative backgrounds, and smooth scrolling to create a more engaging frontend experience.
The project is particularly useful for developers working on process timelines, company workflows, project journeys, roadmaps, portfolios, agency websites, product journeys, and onboarding pages.
Performance should still remain part of the design conversation. According to the 2025 Web Almanac, the median mobile homepage was approximately 2.56 MB, with JavaScript accounting for about 632 KB and images around 911 KB. This is an important reminder that visual effects should enhance a website without unnecessarily increasing its technical overhead.
In this guide, we’ll explore how this animated timeline works, what technologies are used, why the design is effective, and how you can customize the project for your own website.
What Is an Animated Timeline Website Design?
An animated timeline website design presents information chronologically or sequentially while using animation to visually communicate progress between different stages.
A conventional timeline might simply show:
Step 1 → Step 2 → Step 3 → Step 4
An interactive version can make each stage respond to scrolling. As visitors move down the page, the timeline can highlight the current stage, animate a progress line, activate content cards, and move a visual element along the journey.
This makes the timeline more than a static UI component.
It becomes a visual storytelling mechanism.
Animated timelines work especially well for:
- Development processes
- Company histories
- Project workflows
- Product development
- Service processes
- Career timelines
- Roadmaps
- Event schedules
- Customer journeys
- Agency work processes
- Educational content
- Portfolio presentations
The goal is not to animate everything on the screen. Instead, animation should help users understand where they are and what comes next.
Animated Timeline Website Features
This particular project focuses on several frontend techniques that work together to create the final experience.
1. Scroll-Based Timeline Progress
One of the most noticeable elements is the timeline progress system.
As the user scrolls through the page, the progress indicator moves along the timeline. This creates a clear visual connection between the user’s position and the content being displayed.
The effect is especially useful when the timeline contains several stages.
Instead of asking users to mentally determine their position, the interface communicates progress visually.
2. Interactive Timeline Nodes
Each stage of the timeline contains a visual node.
When the corresponding section becomes active, the node can change its visual state. This helps users identify the current step while scrolling.
For example:
01 — Planning
02 — Design
03 — Development
04 — Launch
The active state creates a stronger relationship between the timeline and the associated content.
3. Animated Rocket Element
A rocket graphic is used as the moving visual element in this project.
As the timeline progresses, the rocket travels along the path. The movement gives the page a sense of direction and makes the scrolling interaction more memorable.
The rocket also communicates an idea without requiring additional text:
The project is moving forward.
This is a useful example of how decorative animation can support the meaning of a UI component.
4. SVG Timeline Path
The project also uses SVG-based elements for the timeline path.
SVG is particularly useful for interfaces like this because paths and shapes can be controlled precisely with CSS and JavaScript.
Instead of relying entirely on raster images, SVG allows developers to create scalable visual elements that remain sharp across different screen sizes.
For a responsive timeline, this can be a major advantage.
5. Smooth Scrolling
Smooth scrolling contributes to the overall experience by making the transition between sections feel more natural.
The project uses Lenis to create a smoother scrolling experience.
This is particularly noticeable when combined with scroll-driven animation because the timeline, rocket, and progress indicator can feel more connected to the user’s movement.
However, smooth scrolling should be implemented carefully. It should enhance navigation rather than interfere with accessibility or normal browser behavior.
Technologies Used in This Timeline Project
The project uses a relatively straightforward frontend stack.
| Technology | Purpose |
|---|---|
| HTML5 | Page structure and timeline content |
| CSS3 | Layout, styling, responsive design and visual effects |
| JavaScript | Scroll interactions and animation logic |
| SVG | Timeline path and scalable graphics |
| Lenis | Smooth scrolling |
| WebP/PNG assets | Decorative backgrounds and visual elements |
The benefit of this approach is simplicity.
You don’t need a large frontend framework to create an attractive interactive timeline.
For a focused component like this, HTML + CSS + JavaScript can provide plenty of control.
Understanding the HTML Structure
The HTML file acts as the foundation of the project.
A typical timeline structure separates the page into logical sections:
- Main timeline wrapper
- Timeline track
- Timeline nodes
- Content cards
- Progress indicator
- Decorative elements
- CTA section
Keeping these elements logically separated makes the project easier to customize.
For example, developers can replace the existing timeline content without rewriting the animation system.
This separation between content and interaction logic is one of the most useful aspects of the project.
How CSS Creates the Timeline Design
CSS is responsible for much of the visual appearance.
It controls:
- Timeline positioning
- Card layouts
- Typography
- Spacing
- Colors
- Borders
- Rounded corners
- Background effects
- Responsive behavior
- Animation states
- SVG positioning
Modern CSS makes it possible to create sophisticated interfaces without relying on dozens of JavaScript calculations.
This is important because JavaScript can become expensive when a page contains many interactive components.
The 2025 Web Almanac reports that 98.1% of pages make at least one request for a JavaScript file, while also noting that JavaScript remains a major contributor to page weight and runtime cost.
That doesn’t mean JavaScript should be avoided.
It means developers should use it where it provides genuine value.
How JavaScript Controls the Animation
The JavaScript layer is responsible for turning the static timeline into an interactive experience.
The basic concept is straightforward:
- Detect the user’s scroll position.
- Determine which timeline section is currently visible.
- Calculate progress along the timeline.
- Update the progress indicator.
- Move the rocket accordingly.
- Highlight the appropriate timeline node.
- Update active cards or sections.
- Continue the animation as the user scrolls.
The result is a timeline that reacts to the visitor instead of simply displaying static content.
Why Scroll Position Matters
The animation needs to know where the visitor is within the timeline.
JavaScript can use the current scroll position and the dimensions of the timeline container to calculate a progress value.
Conceptually, this looks like:
Progress = Current Scroll Position ÷ Total Timeline Distance
That value can then be converted into a position along the visual path.
This approach allows multiple elements to remain synchronized.
Why Scroll-Synchronized Animation Works So Well
The biggest strength of this animated timeline website design is that different visual elements tell the same story.
The user scrolls.
↓
The timeline progresses.
↓
The progress line advances.
↓
The rocket moves.
↓
The relevant node becomes active.
↓
The corresponding content becomes more prominent.
This creates visual continuity.
Instead of having unrelated animations competing for attention, several small interactions reinforce one another.
That is an important design principle that is often overlooked in animated website projects.
Responsive Animated Timeline Design
A timeline that looks impressive on desktop can easily become difficult to use on mobile.
That’s why responsive behavior should be considered from the beginning.
The project includes responsive CSS to adapt the layout for smaller screens.
On mobile devices, developers should pay particular attention to:
- Timeline width
- Card spacing
- Font size
- Touch targets
- Vertical spacing
- Animation distance
- Image dimensions
- Overflow behavior
- Scroll performance
A good responsive timeline should remain understandable even when the screen width becomes significantly smaller.
Desktop vs Mobile
| Desktop | Mobile |
|---|---|
| More horizontal breathing room | Compact layout |
| Larger visual elements | Reduced decorative elements |
| Wider content cards | Narrower cards |
| More space for animation | Simplified movement |
| Larger timeline spacing | Optimized vertical spacing |
The objective isn’t necessarily to make mobile identical to desktop.
The objective is to preserve the same user journey.
Performance Considerations for Animated Websites
Animation can make a website more attractive, but excessive animation can create performance problems.
This is especially important when using:
- Large images
- Multiple JavaScript libraries
- Continuous scroll listeners
- Complex SVG paths
- Large background assets
- Multiple simultaneous animations
The 2025 Web Almanac found that the median mobile homepage included approximately 632 KB of JavaScript, while the median desktop homepage used around 697 KB.
For developers, the lesson is simple:
Don’t add JavaScript just because you can.
Use CSS for effects that CSS can handle efficiently, and reserve JavaScript for interactions that genuinely require dynamic behavior.
A Common Mistake: Animating Everything
One of the biggest mistakes beginners make is adding animation to every element.
A timeline doesn’t need:
- Every heading to bounce
- Every card to rotate
- Every icon to continuously move
- Multiple background elements to constantly transform
Too much movement can make a page feel chaotic.
Instead, establish one primary interaction.
In this project, the timeline journey and rocket movement provide that central interaction.
Other effects support the main animation instead of competing with it.
This creates a cleaner visual hierarchy.
How to Customize the Timeline Source Code
One advantage of a structured frontend project is that developers can customize it without rebuilding everything.
Change Timeline Content
You can replace the existing steps with your own workflow.
For example:
01 — Discover
Research and requirements
02 — Design
Wireframes and visual design
03 — Develop
Frontend implementation
04 — Launch
Testing and deployment
This makes the same UI suitable for agencies, freelancers, developers, startups, and product teams.
Change the Visual Theme
The CSS can be modified to create different visual styles.
You can experiment with:
- Dark mode
- Light mode
- Gradient backgrounds
- Minimal layouts
- Corporate colors
- Neon UI
- Glassmorphism
- Soft shadows
- Different border styles
The HTML structure can remain largely unchanged while the CSS controls the visual identity.
Replace the Rocket
The rocket is only one possible visual metaphor.
You could replace it with:
- A car
- A spaceship
- A glowing circle
- A character
- A product icon
- A location marker
- A progress indicator
The important part is keeping the animation synchronized with the timeline.
Where Can You Use an Animated Timeline?
An animated timeline website design isn’t limited to one type of website.
Agency Websites
Digital agencies can use timelines to explain their workflow:
Research → Strategy → Design → Development → Launch
This gives potential clients an immediate understanding of the service process.
Portfolio Websites
Developers and designers can create a project journey:
Idea → Planning → Development → Testing → Deployment
Startup Websites
Startups can present product development milestones or company growth.
SaaS Websites
A timeline can explain onboarding:
Create Account → Configure → Integrate → Launch
Event Websites
Event organizers can present schedules and important milestones.
Educational Websites
Courses can use timelines to show learning paths and modules.
SEO Benefits of Using Interactive Content
An animated interface doesn’t automatically improve search rankings.
This is an important distinction.
Search engines still need meaningful content that explains the subject of the page.
Therefore, the best approach is to combine:
Useful text + semantic HTML + accessible content + visual interaction
For example, if a timeline explains a development process, each timeline step should contain actual descriptive content.
Don’t hide all meaningful information inside animation.
Users and search engines should still be able to understand the page when animations are disabled.
This approach creates a better foundation for technical SEO, accessibility, and user experience.
Accessibility Considerations for Timeline Animations
Animation should never be the only way users understand the content.
Consider adding:
- Semantic HTML
- Descriptive headings
- Proper contrast
- Keyboard-friendly controls
- Meaningful text alternatives
- Visible focus states
- Reduced-motion support
A particularly important consideration is the prefers-reduced-motion CSS media query.
Users who experience discomfort from motion may configure their operating system to reduce animations.
A thoughtful implementation can respect that preference by reducing or disabling non-essential movement.
This is one of those details that can separate a visually impressive project from a genuinely professional one.
What Makes This Timeline Project Different?
Many timeline examples focus purely on appearance.
This project takes a more interaction-focused approach.
The timeline isn’t simply a list of cards connected by a line.
It combines:
- Scroll position
- Progress tracking
- Active states
- SVG path positioning
- Rocket movement
- Smooth scrolling
- Responsive layout
- Decorative backgrounds
The important insight is that these elements work as one interaction system.
That is more valuable than simply adding random animations.
Tips for Improving the Design Further
If you want to extend this timeline project, consider these improvements.
Add Keyboard Navigation
Allow users to move between timeline stages using accessible controls.
Add Progress Percentage
A small percentage indicator could show how far the user has progressed.
Add Microinteractions
Subtle hover effects can make cards feel more interactive without overwhelming the page.
Optimize Images
Convert large images to modern formats such as WebP or AVIF where appropriate.
Reduce Unnecessary JavaScript
If an effect can be implemented efficiently with CSS, consider using CSS instead.
Add Reduced-Motion Support
Respect user preferences for reduced animation.
Improve Loading Behavior
Lazy-load non-critical assets and avoid loading large decorative resources before they are needed.
Who Should Use This Animated Timeline Project?
This project is particularly useful for:
- Frontend developers
- Web designers
- UI/UX designers
- Students learning JavaScript
- Developers building portfolios
- Digital agencies
- Freelancers
- Startup teams
- Web development learners
Beginners can study the project to understand how HTML, CSS, and JavaScript interact.
More experienced developers can use the structure as a starting point for building more advanced interactions.
Final Thoughts
A good animated timeline website design should do more than look impressive.
It should help visitors understand information.
This project demonstrates how relatively straightforward frontend technologies—HTML, CSS, JavaScript, SVG, and smooth scrolling—can work together to create an engaging interactive experience.
The most valuable lesson is not the rocket animation itself.
It is the relationship between scrolling, progress, content, and visual feedback.
When those elements are synchronized, a simple timeline can become an engaging storytelling component.
At the same time, performance and accessibility should remain part of the development process. The 2025 Web Almanac shows how JavaScript and overall page weight continue to grow across the web, making efficient implementation increasingly important.
Whether you’re creating a portfolio, agency website, product roadmap, workflow section, or development process page, this type of interactive timeline provides a flexible foundation that can be adapted to many modern web projects.
You can embed the live project demonstration here so visitors can interact with the timeline directly rather than only viewing screenshots.
Frequently Asked Questions
What is an animated timeline website design?
An animated timeline website design is a webpage component that presents sequential information using visual elements and animation. It can use scrolling, progress indicators, active states, SVG paths, and JavaScript interactions to make each stage more engaging.
Can I create an animated timeline using HTML and CSS?
Yes. HTML can provide the structure while CSS handles layout, styling, transitions, and many visual effects. JavaScript can then be added when you need dynamic scroll-based interactions or more advanced animation logic.
Is JavaScript required for a timeline animation?
Not always. Basic timeline animations can be created with CSS. JavaScript becomes useful when the animation needs to respond dynamically to scroll position, calculate progress, activate different sections, or synchronize multiple elements.
Is this timeline responsive?
Yes. The project is designed with responsive CSS so the timeline can adapt to different screen sizes. However, developers should always test customized versions on actual mobile devices and different viewport sizes.
Can I customize the timeline content?
Yes. You can replace the existing timeline steps, headings, descriptions, graphics, colors, and other visual elements according to your project requirements.
Can I use an animated timeline on a portfolio website?
Absolutely. A timeline works particularly well for portfolios because you can use it to explain your development process, project milestones, professional journey, or case-study workflow.
How can I improve animated website performance?
Start by optimizing images, limiting unnecessary JavaScript, reducing expensive scroll calculations, using efficient CSS animations, and loading non-critical resources only when needed. Performance should be tested after customization rather than assumed from the development environment.
Is an animated timeline good for mobile websites?
Yes, provided the animation is responsive and doesn’t interfere with scrolling or readability. On smaller screens, simplifying decorative effects and maintaining comfortable spacing can produce a better experience.
What technologies are used in this timeline project?
The project uses HTML5, CSS3, JavaScript, SVG assets, image assets, and Lenis smooth scrolling to create the interactive timeline experience.
Can the rocket animation be replaced?
Yes. The rocket is a visual element and can be replaced with another graphic or animation that matches the theme of your website. The underlying timeline and scroll logic can remain the same with appropriate adjustments.
Should every element on a website be animated?
No. Animation is most effective when it has a purpose. A few well-coordinated interactions are usually more effective than animating every component on the page.
Related Templates You May Like
7 people bought this
Grab it Now for Just 499 ₹999